Sunday 15 November 2020

Easily made candle décor


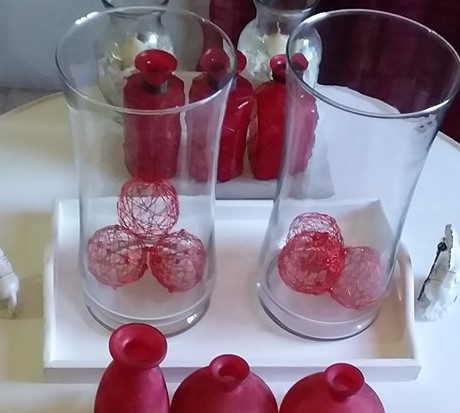
This DIY project is the easiest I have done so far and it did not make a mess or cost me much, all that was needed was candles, a vase, and some good white rock.

This project was started due to the fact that I had space on my counter wall that was bare and wanted a highlight of some decor.

 So I decided to utilize the space with some vase with candles that can also be used as lightning if I need to calm the room with candlelight

I used white rocks for this project but it can also be done with rocks of your preference and vase, of course, I went for a smaller vase to level out the length of the space I was working with.

The project starts with rocks being placed into the vase, you can fill the vase to your preferred height.

When the vase has been filled the easiest way to get
 the candle in place is to put the candle in the middle of the rocks, hold the vase and give it a shake while pushing the candle into place.

And that is all that it takes to get an easily made candle decor, that looks really nice and enhances an empty area. 

Happy creating everyone😊


.


Monday 25 November 2019

From Old To New- Do it yourself-DIY


I am an artistic individual and I like to explore artistry, I like to see things take a different direction from a once dull one in looks and shape from workmanship.
Turning old to new can be accomplished by anyone if you know you can and have the will power to do such.

Turning An Old Tray Into New


This project I was overjoyed to do, I saw the idea so plain when I saw this dull worn out tray, just looking to discard.
And oh what a difference some sanding and a little paint can do, no longer does it look like how it once was, but It now looks like a brand new tray bought out of a store.


A Dull Brass Tray- Let It, Shine.


This tray I also had an idea for when I first saw it, and with a little help from a cleaning video on youtube I was able to make it shine once more.
Soaking in vinegar, flour, and salt is all it took to bring this brass tray back to its shining posture.


Monday 22 October 2018

Old Drawers DIY


This is the perfect time to enhance your bathroom with an easy concept that consist of some old drawers that not only gives you room to put those delicate pieces of fine arts of decor, but drawers that you will no longer from today throw away, as this DIY drawer project adds aasimple sophistication of elegance when it is finished and the art decor is placed within.

Drawers are always laying around and you can get them from old furnishing that you may want to dismantle or throw away.


Today I am telling you, don't ever throw away those drawers because there is so much you can do with them to utilize a small or big space as you add more positioning to a room.

In my bathroom was just a plain wall behind the toilet seat and I always look at that plain spot as I tried to decide what to do with it.

I had a console table that was damage an I devdecito dismantle it and use whatever wood etc it had to do more DIY projects.

Then the idea came to me to use the drawers as place cubes on the wall that I can place my  bathroom decor in.

And as you can see it was no trouble at all, I got the two old drawers and clean them off, I took off the handles and painted them white to go back with my colour scheme in the bathroom.


It was all an easy task, as I got the holes drilled on the bathroom wall where I was positioning the drawers.


When I got them up and put in place I decided to add decor of the water kind, boats in bottles some star fish, two vase and to add a little color I add two scented candles.

And the finished look really enhance my bathroom as it really put a simple sophisticated and elegant look to the room and that is the look that I was looking for :)

This DIY drawer project you will really enjoy doing as it's so easy to do, and you can add drawers as space savers in your bedroom, bathroom, kitchen, laundry room, living room, dinning room etc, all it takes is an eye for detail and some good old drawers to compliment an open space.

And you will surely see the difference when everything is put in place.

You can basically used these drawers to put anything in when they are placed at the correct location, from books to decor, glass ware, plants etc.

Old drawers always come in handy as they get transform into space savers to help make an empy space come alive with vibrancy etc.


Saturday 24 March 2018

My DIY Ottoman


I'm a multi-talented female who just likes to help myself, I find it hard to ask someone to help me as I like to try and do things myself.

I like to do projects around the house as I like to see color and my self made pieces come to their final stage as I see them as beautiful pieces of art.

This project consists of two Ottomans which I decided to do to add more color to my living area and sectional.

And this project was not that expensive as it was just under $20 dollars and that was to purchase the fabric of my choice.

The wood came from the workmen that were doing work around the apartment and the legs I got off a bed base that I didn't want, which by the way saved me so much because the feet are really expensive if I had to buy it from the store.

And I can say that I was so favored because all the wood I got to used was already cut to side,  so it made my work easy as all that I had to do was securely put them together.

Then I add the feet and some sponge that I recycle from the base and used my staple gun to secure the sponge in place and I then covered it with some fine fabric.


The legs were varnished and I didn't like the color I'm a white paint lady as white just makes all colors pop :)

So I decided to used some paint that I had laying around and paint the legs in white, which by the way really made the Ottoman look even better.


So the final touch was putting on the fabric and I found the perfect color fabric to put on my ottoman :) bright and pretty the way I like it.


The finished product and I didn't spend much to do it :)

And I would encourage individuals to try a thing or two when it comes to making things, whether it's in cooking , painting, sewing, etc you can do it if only you will try :)

My artistic side is flowing high and yours can too :)

And this ottoman would have cost me a few hundred dollar if I had bought it, but I didn't spend that became I did it myself :)) and that is the best part of creating things, as you know you did it and you can admire your beautiful work :) 

Happy creating :)


Sunday 26 February 2017

From Trash To Plush.

The Final Plush Look. 

The saying one man's trash is another man's treasure is surely right :))

So much things gets thrown away daily and if these individuals would really consider a different avenue they would certainly save some money. 

As most of the things that they throw away can be remake or fix to look a brand new better way. 

I am an artistic individual and I always like my artistic juices flow, as I make or repair something or the other :))

I had to jump at this opportunity when I found this coffee table one night coming home from work,  let's just call it my first dumpers diving :)) 

Not actually in a dumpers but thrown out by some neighbors in the neighborhood. 


This is the table and on top it had a layer of glass which was broken and as you can see the glued top when I took off the glass. 

When I saw the table I told myself I can make it look brand new and I took up the challenge to do just that. 

I took the table home, and the next day I started the project by taking off all the glass which by the way was a bit of a challenge as it was glued to the table and I had to break most of it off. 

I used fine grain sand paper to sand off the table and to get the stubborn glue off I used a razor blade and just scrape until It came off. 

After I continue to sand the table until no more glue remained and the table was as smooth to the touch. 

I painted the table with white paint and I decided to leave the top as sanding it gave it a really tan finished look which I know would have looked perfect with the white paint when painted. 

It only took me about two to three hours to finish the table and I am very please with myself on the finish job. 

As now I have a table that I can utilize in any area of my home something that I didn't had to pay for, something that I kind of work on myself :)


Monday 29 August 2016

Mat Wall Painting


Looking at this you would think that it is a painting, well look again because it is not.

One day I wanted to get some paintings for my wall and I looked but could not find any that suit my taste or color scheme.

So this thought came to me and this is how I got my paintings.


I went to the store and look for some mats that would make the perfect painting and that will go back with my color 
scheme.

I found two of the same and I came home and hang them on my wall, when my friend visit they aalways like the look and had no clue that they were mats until I told them they were :)

So you see how easy DIY can be done :)

Design Candles


These are plain candles that I had laying around and I just decided to add a spark to them :) 

And it was no trouble at all as I it took was some ribbon of my preference , glue and some beads that I had laying around.

Beads , sequins and other things fall off your cothing sometimes and I am a person that just pick them up and put them away for another day :))

Or you can go to a fabric store and purchase some new ones of your choice, just decide on a design and go all the way with it :) 

You can be artistic and do some designs of your choice that I know will really make your candle stand out.

Happy creating everyone.